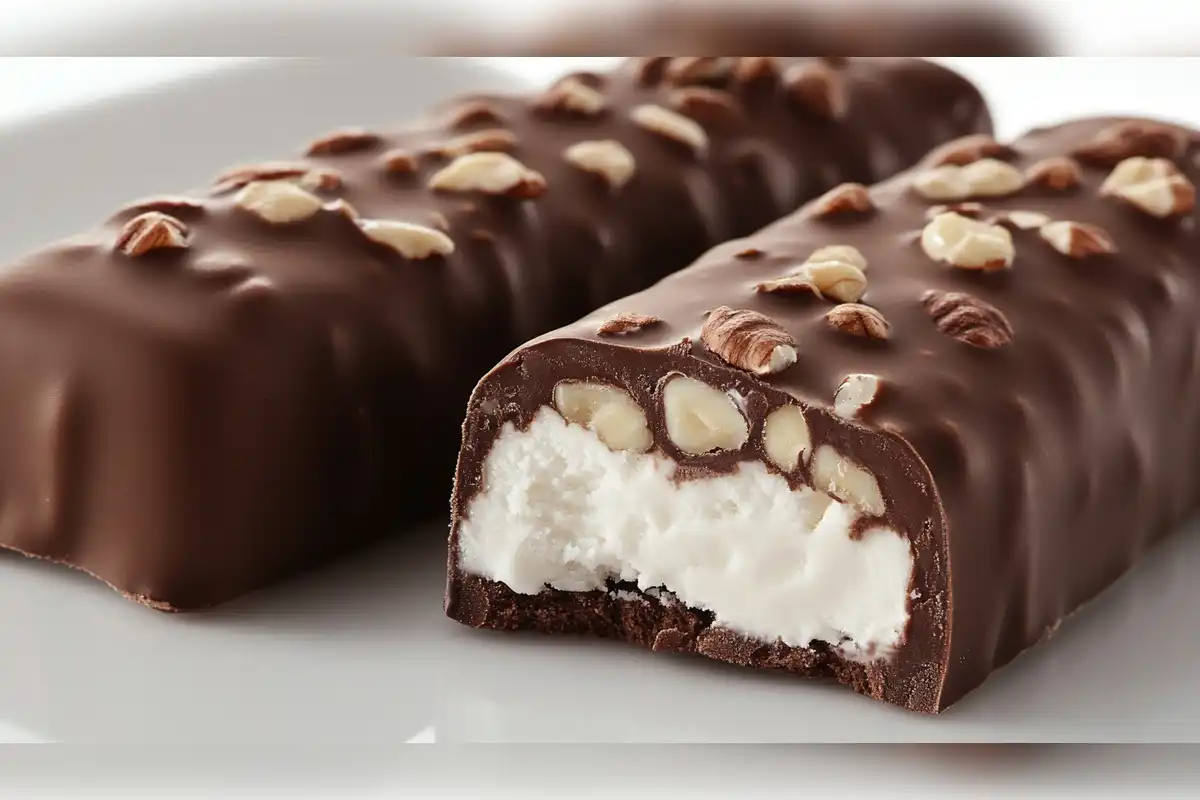
If you’re craving a cool, chocolate-coated treat, this best homemade Eskimo Pie popsicle recipe is exactly what you need. These nostalgic frozen desserts are easy to make at home, customizable to your taste, and perfect for satisfying that sweet tooth. In this guide, we’ll show you step-by-step how to craft the perfect homemade Eskimo Pie popsicles, with tips to make them even better than store-bought versions.
Why Make Your Own Eskimo Pie Popsicles?
You may wonder why you should go through the trouble of making these popsicles at home when you can easily buy them. Here are a few compelling reasons to try your hand at making the best homemade Eskimo Pie popsicle recipe:
- Control Over Ingredients: When making your own popsicles, you can choose the quality of ingredients. No more artificial preservatives or flavorings — just pure, delicious flavors.
- Customizable Flavors: Want a mint chocolate version or a caramel swirl inside? You can experiment and create your own flavor combinations.
- Fun Activity: Making popsicles is a fantastic family activity, especially for kids. It’s fun, creative, and incredibly rewarding when you take that first bite.
Ingredients and Tools You’ll Need
Before we dive into the best homemade Eskimo Pie popsicle recipe, let’s gather all the necessary ingredients and tools.
Ice Cream Filling Options:
- Vanilla Ice Cream: This is the classic base for Eskimo Pies, but you can switch it up with other flavors like chocolate, strawberry, or mint.
- Mix-ins (Optional): You can add crushed cookies, nuts, or even fruit to the ice cream to make your popsicles even more exciting.
Chocolate Coating:
- Semi-Sweet Chocolate Chips or Chopped Chocolate: You’ll need about 1 cup.
- Coconut Oil (Optional): 2 tablespoons for a smoother coating.
Tools:
- Popsicle Molds: If you don’t have molds, you can use small paper cups as a creative alternative.
- Popsicle Sticks: To give that authentic popsicle feel.
- Microwave-Safe Bowl: For melting the chocolate.
- Spatula or Spoon: To help fill the molds.
- Freezer: Of course, for freezing your popsicles.
Step-by-Step Guide to Making the Best Homemade Eskimo Pie Popsicle Recipe
Now that you’ve got everything you need, let’s get started. Follow these steps to create your delicious, homemade Eskimo Pie popsicles.
Step 1: Prepare the Ice Cream
The first step is softening the ice cream to make it easier to mold.
- Choose Your Flavor: Vanilla is a classic choice, but you can also experiment with chocolate, strawberry, or even unique flavors like mint.
- Let It Soften: Leave the ice cream out for 5-10 minutes until it becomes soft and scoopable, but not melted.
Tip: If you want to add mix-ins like crushed cookies or fruit, fold them into the softened ice cream before you fill the molds.
Step 2: Fill the Popsicle Molds
Now it’s time to fill your molds (or paper cups if you’re improvising). Here’s how:
- Spoon the Ice Cream: Use a spatula or spoon to carefully spoon the softened ice cream into the popsicle molds.
- Smooth the Surface: Make sure the ice cream is evenly distributed and smooth out the surface to avoid air bubbles.
- Insert Popsicle Sticks: Place the popsicle sticks into the center of the molds.
Once your molds are filled, place them in the freezer for at least 4-6 hours. For the best results, freeze them overnight.
Tips for Making Perfect Eskimo Pie Popsicles
Here are some extra tips to ensure your Eskimo Pie popsicles turn out as delicious as possible:
- Avoid Ice Crystals: To keep your popsicles smooth and creamy, try to prevent air bubbles when filling the molds, as these can lead to ice crystals forming.
- Don’t Rush the Freezing Process: Be patient and let your popsicles freeze completely. Rushing will result in unevenly frozen popsicles, which might fall apart during the dipping process.
- Experiment with Flavors: Once you’ve mastered the basic recipe, try adding different extracts (like peppermint or almond) to the ice cream or chocolate for a fun twist.
How to Store Homemade Eskimo Pie Popsicles
After putting all this effort into making the best homemade Eskimo Pie popsicles, you’ll want to store them properly so they last. It’s important to know the best way to store homemade popsicles to keep them fresh and delicious.
To store them:
- Use Airtight Containers: Place the popsicles in an airtight container, and if you’re layering them, use parchment paper between layers to prevent sticking.
- Freeze Immediately: Store the popsicles in the coldest part of your freezer to avoid freezer burn.
- How Long Do They Last?: Properly stored, your homemade popsicles can last up to 2 months.
Step 3: Prepare the Chocolate Coating
Once your ice cream popsicles are fully frozen, it’s time to make the irresistible chocolate coating. This step adds the signature crunch to your homemade Eskimo Pie popsicles.
- Melt the Chocolate: Place the semi-sweet chocolate chips (or chopped chocolate) in a microwave-safe bowl. If you want a smoother texture, add 2 tablespoons of coconut oil. Microwave the chocolate in 20-second intervals, stirring between each session, until the chocolate is fully melted and smooth.Tip: You can also melt the chocolate using a double boiler if you prefer.
- Add Flavor Extracts (Optional): For a twist, you can add a few drops of vanilla, mint, or almond extract to the melted chocolate. This adds an extra layer of flavor to your popsicles.
Step 4: Dip and Coat the Popsicles
Now that the chocolate is ready, it’s time for the fun part — dipping your popsicles into the chocolate coating.
- Remove Popsicles from the Molds: Take your frozen popsicles out of the freezer and carefully remove them from the molds. If you’re having trouble, run warm water over the outside of the molds for a few seconds to loosen the popsicles.
- Dip into Chocolate: Quickly dip each popsicle into the melted chocolate, allowing the excess to drip off. The cold popsicle will cause the chocolate to harden almost instantly.Tip: You can sprinkle crushed nuts, sprinkles, or cookie crumbs onto the chocolate coating while it’s still wet for added texture and flavor.
- Place on Parchment Paper: Lay the popsicles on parchment paper and place them back in the freezer for another 15-30 minutes to ensure the coating fully sets.
How to Make Perfect Eskimo Pie Popsicles: Extra Tips
To make sure your popsicles are a hit every time, follow these additional tips:
- Choose High-Quality Chocolate: The better the chocolate, the better your popsicles will taste. Try to use premium semi-sweet or dark chocolate for a rich flavor.
- Experiment with Mix-ins: Don’t hesitate to get creative! Add crushed Oreos, chopped nuts, or even swirls of caramel or peanut butter to your ice cream base for a unique twist.
- Avoid Over-Freezing: While it’s tempting to leave your popsicles in the freezer indefinitely, remember to consume them within 1-2 months for the best texture and flavor.
Frequently Asked Questions (FAQs)
Homemade popsicles can be a fun and rewarding treat, but you may still have some questions. Here are answers to some commonly asked questions related to making the best homemade Eskimo Pie popsicle recipe:
Q1: How to Store Homemade Popsicles?
It’s important to store your homemade popsicles properly to keep them fresh and delicious. Here are some storage tips:
- Use Airtight Containers: To prevent freezer burn and ice crystals, store your popsicles in airtight containers.
- Layer with Parchment Paper: If you’re stacking popsicles in a container, place parchment paper between layers to prevent them from sticking together.
- Freeze in the Coldest Part: Store your popsicles in the back of the freezer where the temperature is more consistent.
For more detailed advice on how to store homemade popsicles, check out our full guide on dessert storage solutions.
Q2: How Do You Make Popsicles Freeze Faster?
If you’re short on time and want your popsicles to freeze faster, here are a few tricks you can try:
- Spread Them Out: Don’t overcrowd your freezer. Spread out the popsicle molds so cold air can circulate freely around them.
- Use a Cold Tray: Place the popsicle molds on a cold baking tray before putting them in the freezer. This will help the popsicles freeze more evenly and quickly.
- Salt and Ice Water Method: If you’re using an ice-filled cooler to freeze the popsicles, add salt to the ice. The salt lowers the temperature of the ice, helping the popsicles freeze faster.
For more tips on freezing treats, see our comprehensive article on how to make popsicles freeze faster.
Q3: How to Make Homemade Popsicles Without a Mold?
Don’t have popsicle molds at home? No worries! You can still enjoy homemade Eskimo Pie popsicles by using common household items as substitutes. Here’s how:
- Paper Cups: Small paper cups make excellent makeshift molds. Simply fill them with your ice cream mixture and insert a popsicle stick. Once frozen, peel away the paper cup.
- Ice Cube Trays: Ice cube trays can work for bite-sized popsicles. Fill the tray with your mixture, cover with plastic wrap, and poke toothpicks through the wrap for mini sticks.
- Silicone Muffin Molds: If you have silicone muffin molds, they make a great substitute for popsicle molds. They are flexible and easy to pop the frozen treat out of.
Want more creative ideas? Head over to our post on how to make homemade popsicles without a mold for additional suggestions.
Conclusion: Make Your Own Delicious Eskimo Pie Popsicles Today!
Making your own homemade Eskimo Pie popsicles is not only fun but also allows you to customize your treats to perfection. Whether you stick with the classic vanilla and chocolate combination or experiment with new flavors, these popsicles are sure to impress your family and friends. Plus, they make for the perfect frozen treat on a hot day.
Remember, the key to perfect popsicles is patience. Let them freeze completely, choose quality ingredients, and don’t be afraid to get creative with flavors and textures.
Start crafting your own batch of Eskimo Pie popsicles today, and don’t forget to share your creative variations with us!

