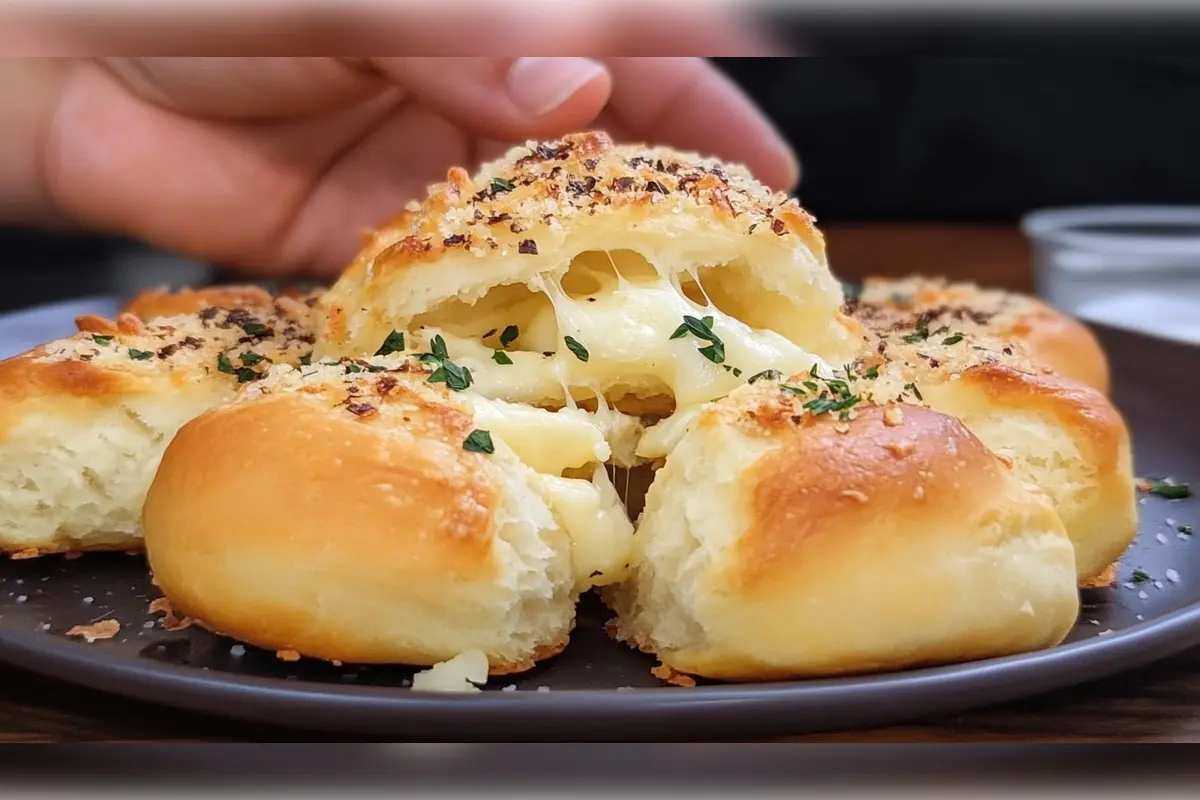
If you’re looking for a quick, delicious, and cheesy appetizer, then look no further than Pillsbury Biscuit Garlic Butter Cheese Bombs. These savory bites combine the flaky goodness of Pillsbury biscuits with the irresistible flavors of garlic, butter, and melted cheese. Whether you’re preparing for a party or a casual family meal, these cheese bombs are sure to be a hit. Ready to get started? Let’s dive into this easy recipe.
Ingredients Needed for Garlic Butter Cheese Bombs
To make the best Pillsbury Biscuit Garlic Butter Cheese Bombs, you’ll need a handful of simple ingredients. Here’s what you’ll need:
- 1 can of Pillsbury Grands! Biscuits (or similar Pillsbury biscuits)
- 2 cups of shredded cheese (mozzarella or cheddar work best)
- 1/2 cup of melted butter
- 3 cloves of garlic, minced
- 1 tablespoon of fresh parsley, chopped (optional)
- Salt and pepper to taste
These basic ingredients come together to create an explosion of flavor, with a crunchy outside and gooey, cheesy center.
Step-by-Step Instructions for Making Garlic Butter Cheese Bombs
Making Pillsbury Biscuit Garlic Butter Cheese Bombs is a breeze! Follow these simple, step-by-step directions to achieve flawless results each time.
Step 1: Prepare the Garlic Butter
In a small pan or microwave-safe dish, melt the butter and mix in the finely minced garlic. Allow the garlic to infuse the butter for about a minute, then set it aside. This garlic butter will be used to brush the biscuits before baking and to drizzle over the top afterward.
Step 2: Prep the Pillsbury Biscuits
Open the can of Pillsbury Grands! Biscuits and separate each one. Using your fingers, gently flatten each biscuit to about double its original size. This will make it easier to stuff with cheese.
Step 3: Stuff with Cheese
Place a generous amount of shredded cheese (about a tablespoon) in the center of each flattened biscuit. Once the cheese is in place, fold the edges of the biscuit over the cheese and pinch them together to seal it tightly. This prevents the cheese from leaking during baking.
Step 4: Bake to Perfection
Preheat your oven to 375°F (190°C). Arrange the sealed biscuit bombs on a parchment-lined baking sheet, leaving space between each one. Brush each biscuit with the prepared garlic butter and bake for 12-15 minutes, or until golden brown and puffed up.
Tips for the Perfect Garlic Butter Cheese Bombs
Want to ensure your Pillsbury Biscuit Garlic Butter Cheese Bombs come out perfect every time? Here are some pro tips:
- Use Cold Cheese: Cold shredded cheese helps the cheese melt slowly, preventing leaks during baking.
- Seal Tightly: Make sure to pinch the edges of the biscuit tightly to prevent the cheese from oozing out.
- Don’t Overcrowd: Give the biscuits enough space on the baking sheet so they can bake evenly.
- Brush Midway: For extra garlic flavor, brush the bombs with more garlic butter halfway through baking.
These tips will help you achieve perfectly golden, cheesy biscuits that everyone will love!
Variations on the Recipe
While the classic Pillsbury Biscuit Garlic Butter Cheese Bombs recipe is already delicious, you can add your own twist by experimenting with different flavors and ingredients. Here are some variations to try:
Cheese Variations
- Mozzarella: Use mozzarella for a classic gooey cheese pull.
- Cheddar: Add sharp cheddar for a bolder flavor.
- Mixed Cheeses: Try a blend of mozzarella, cheddar, and parmesan for extra depth.
Adding Herbs
- Basil: Add fresh basil for a light, fragrant twist.
- Rosemary or Thyme: These herbs bring a savory touch to the garlic butter.
Spicy Version
- Jalapeños: For a spicy kick, add sliced jalapeños to the cheese filling.
- Chili Flakes: Sprinkle some chili flakes into the garlic butter for heat.
Meat Additions
- Bacon: Add cooked, crumbled bacon to the cheese filling for a savory bacon-cheese bomb.
- Pepperoni: Stuff the biscuits with cheese and small pepperoni slices for a pizza-inspired snack.
Serving Suggestions
Once your Pillsbury Biscuit Garlic Butter Cheese Bombs are ready, it’s time to think about how to serve them. Here are some delicious ideas:
- Pair with Dips: Serve with marinara sauce, ranch dressing, or garlic aioli for dipping.
- As an Appetizer: These cheese bombs are perfect as an appetizer for gatherings, game days, or parties.
- Side Dish: Pair them with a hearty soup or salad for a complete meal.
These bombs are so versatile that they can easily adapt to any occasion or mealtime. For a full and detailed recipe on how to make these delicious cheese-filled delights, check out this Mozzarella-Stuffed Ricotta Ball recipe from JoeRecipes.
Storage and Reheating Tips for Garlic Butter Cheese Bombs
If you happen to have leftovers (which is rare because they’re so delicious), storing and reheating your Pillsbury Biscuit Garlic Butter Cheese Bombs properly is essential to keep them fresh and tasty. Here’s how you can do that:
Storing the Cheese Bombs
- Refrigeration: After the cheese bombs have cooled, transfer them to an airtight container and refrigerate. They will remain fresh for up to 3 days.
- Freezing: To freeze for future use, let the bombs cool fully. Then, store them in a freezer-safe bag or container. They can be frozen for up to 2 months.
Reheating Instructions
- In the Oven: To reheat and restore the original crispness, place the cheese bombs in a preheated oven at 350°F (175°C) for 5-7 minutes, or until warmed through.
- In the Air Fryer: Reheat the bombs in an air fryer at 350°F for 3-4 minutes for a perfectly crispy texture.
- Microwave: While this is the quickest option, it might make the bombs a little soggy. Place the cheese bomb on a microwave-safe plate and heat for 20-30 seconds.
Proper storage and reheating ensure that your Pillsbury Biscuit Garlic Butter Cheese Bombs retain their crispy, cheesy goodness even after a day or two.
FAQs
To help answer common queries about Pillsbury Biscuit Garlic Butter Cheese Bombs, here’s a detailed FAQ section based on the “People Also Ask” section from Google.
Q1: Can I use homemade biscuit dough instead of Pillsbury biscuits?
Yes, you can! If you prefer homemade dough, it works just as well in this recipe. Just make sure the dough is rolled out to the correct size, and follow the same process for stuffing and sealing. Homemade dough may need a slightly longer baking time, so keep an eye on the biscuits and adjust the baking time accordingly.
Q2: Can I make these garlic butter cheese bombs in an air fryer?
Absolutely! Air fryers are great for achieving a crispy outer layer while keeping the cheese inside melty. To make Pillsbury Biscuit Garlic Butter Cheese Bombs in an air fryer, preheat the air fryer to 350°F. Place the sealed biscuits in the basket, making sure they aren’t touching. Air fry for 8-10 minutes, checking occasionally for even browning.
Q3: How can I prevent the cheese from leaking out during baking?
To prevent cheese from leaking, make sure to seal the dough tightly. Pinch the edges of the biscuit dough together with your fingers and roll the dough in your palm to ensure there are no gaps. Using cold shredded cheese can also help, as it melts more slowly and is less likely to leak during baking.
Q4: Can I make these garlic cheese bombs ahead of time?
Yes, you can prepare these cheese bombs ahead of time. You can assemble the bombs, refrigerate them in an airtight container for up to 24 hours, and then bake them just before serving. Alternatively, you can freeze unbaked bombs and bake them directly from the freezer, adding a few extra minutes to the baking time.
Q5: What type of cheese works best for these bombs?
Mozzarella is the most popular choice because it melts beautifully and gives that signature cheese pull. However, you can also use cheddar, pepper jack, or a combination of different cheeses for added flavor. For an extra cheesy surprise, place a small cube of cream cheese inside the bomb along with shredded cheese.
Q6: Can I add meat to these garlic butter cheese bombs?
Yes, adding meat like bacon, pepperoni, or ham can take these bombs to the next level. Simply add a small piece of cooked bacon or pepperoni along with the cheese before sealing the dough. Make sure the meat is fully cooked beforehand, as the bombs won’t bake long enough to cook raw meat.
Q7: How can I make these garlic bombs gluten-free?
To make these bombs gluten-free, you can use gluten-free biscuit dough or make your own dough using gluten-free flour. Pillsbury also offers gluten-free options for certain products, which can be used to recreate this recipe. Just ensure all other ingredients, like cheese and butter, are also gluten-free.
Nutritional Information for Pillsbury Biscuit Garlic Butter Cheese Bombs
For those interested in the nutritional breakdown of these savory treats, here’s an overview. Please note that this is an estimate and may vary depending on the specific ingredients and quantities used.
- Serving Size: 1 Garlic Butter Cheese Bomb
- Calories: Approximately 120-150 calories per bomb
- Carbohydrates: 10-12 grams
- Fat: 7-10 grams (depending on the cheese and butter)
- Protein: 4-5 grams
- Sodium: Varies depending on the type of cheese and dough used
This information provides a general idea of what to expect nutritionally from this appetizer.
Conclusion: Why You Should Make Pillsbury Biscuit Garlic Butter Cheese Bombs Today
There’s no denying that Pillsbury Biscuit Garlic Butter Cheese Bombs are the perfect combination of simplicity, flavor, and fun. Whether you’re hosting a party, looking for a quick snack, or just craving something cheesy, these bombs are the way to go. They’re versatile, easy to customize, and a hit with kids and adults alike.
So why not give them a try today? With a few basic ingredients and just 20 minutes of your time, you’ll have a tray full of cheesy, buttery goodness that will leave everyone coming back for more. And if you try them, don’t forget to share your creations with friends or on social media—because these cheese bombs are meant to be enjoyed by all!

